This FAQ was written and is maintained by a third-party entity, Scorpius (Aiorii Resident). This FAQ makes no claim of official accuracy, endorsement, nor condoning by Genesis Lab. Please direct all questions regarding this FAQ to Scorpius.
This manual will guide you from the unpacked Head package through setting up your base avatar with your new head. It has these sections:
Please note: 3.x means any item that begins with a 3 - like 3.0, 3.1, 3.2, 3.3, etc. and NAME means the name of the bento head you have unpacked, for example: Anis, Ariana, Ethan, Eva, Flor, Jane, Kiana, Lena, Sofie, or Stephanie.
This manual will guide you from the unpacked Head package through setting up your base avatar with your new head. It has these sections:
- Attaching the Head (Start Here)
- Skin Applying (v3 Genesis Lab Bento Heads are skinless at first)
- Omega Setup (the Omega version requires scripts to be installed)
- Options & Cosmetics (Regular and Omega heads have different options)
- Body Matching (Match the body to the Head)
- Graphics & Lighting (Make sure you can see it correctly)
- HELP? (Tried everything and still stuck?)
Please note: 3.x means any item that begins with a 3 - like 3.0, 3.1, 3.2, 3.3, etc. and NAME means the name of the bento head you have unpacked, for example: Anis, Ariana, Ethan, Eva, Flor, Jane, Kiana, Lena, Sofie, or Stephanie.
Attaching the Head
Inside of your v3 Bento Head Package Folder are many items. We will focus on the ones that you will need to set up your avatar. All of the items in this folder are described in detail in the v3 Bento Head Guide, however. Before beginning these steps, make sure that you are not wearing any other mesh head.
"UPDATE" Box
If your package includes any item whose name ends in UPDATE or UPDATES, make a copy of it and keep it safe. This item will allow you to use a platform machine in the Genesis Lab store to get an instant redelivery with any updates available for your new head. If you have just opened your Head package, you will not need to get an update from the store most likely.
If your package includes any item whose name ends in UPDATE or UPDATES, make a copy of it and keep it safe. This item will allow you to use a platform machine in the Genesis Lab store to get an instant redelivery with any updates available for your new head. If you have just opened your Head package, you will not need to get an update from the store most likely.
Shape
The shape is a core part of any bento head, and to enable you to check to make sure everything is working properly, we will begin by wearing the included shape. Locate the following items and WEAR them (it will change your shape to these new ones):
The shape is a core part of any bento head, and to enable you to check to make sure everything is working properly, we will begin by wearing the included shape. Locate the following items and WEAR them (it will change your shape to these new ones):
- Genesis Lab. - NAME Shape
- Genesis Lab. - NAME BrowShape :: may also be called Brows Shape, Eyebrows, etc.
Alphas
There are two alpha textures included in your package. Locate the following one and ADD it (do not choose wear):
If you don't plan on wearing only the old system eyes, regardless of which brand of eyes you use (I do suggest using the included bento eyes, at least at first), make sure you ADD (not WEAR) the Genesis_Lab_Alpha_Head(for mesh eyes) because it will hide the old system eyes (that you can't detach).
There are two alpha textures included in your package. Locate the following one and ADD it (do not choose wear):
- Genesis_Lab_Alpha_Head(for mesh eyes)
If you don't plan on wearing only the old system eyes, regardless of which brand of eyes you use (I do suggest using the included bento eyes, at least at first), make sure you ADD (not WEAR) the Genesis_Lab_Alpha_Head(for mesh eyes) because it will hide the old system eyes (that you can't detach).
Mesh Objects & HUDs
These are your actual pieces that will put together your Avatar Head for this first section -- remember that NAME means the name of your specific Genesis Lab v3 Head, and that the x in 3.x means for all numbers of x, currently. We will start with the Bento head first and then do the Bento Omega head after, since it requires more setup.
Locate and ADD each of these items:
- Genesis_Head_NAME_3.x Bento :: this is your actual bento mesh head.
- Genesis_Lab_Eyes_v3.x Bento :: these are your bento eyes that change with your shape and be animated.
- Genesis_Head_NAME_Teeth_3.x_Bento :: these are your bento teeth + tongue that can be animated.
- Genesis_Head_NAME_Ears_3.x_Bento :: these are your bento ears that change with your shape (and, in theory, be animated).
Please Note: If putting on your head has made your eyeballs pop through the head or dislocated your jaw or other some such warping/deforming action (like, eyelashes in the middle of your eye, etc.), either right click on your avatar and choose Appearance, then Reset, then Skeleton, or try simply relogging. Sometimes the store of information in your viewer gets corrupted and the only way to fix it is to simply "flush" it.
Everything else
If you would like more information as to what the rest of the items are in your folder, please see the v3 Bento Head Guide page.
Please Note: Your new head will be un-skinned! Your plain white head will now need a Skin. We'll do that next.
If you would like more information as to what the rest of the items are in your folder, please see the v3 Bento Head Guide page.
Please Note: Your new head will be un-skinned! Your plain white head will now need a Skin. We'll do that next.
Skin Applying
Regardless of whether you choose to wear the Bento or the Bento - Omega Head, you will need to apply a Genesis Lab-specific Skin to the Head if you are using a female Genesis Lab Head. The female bento Heads will not accept Omega Skins, even on the Omega Head.
Genesis Lab v3 Skins (as well as Genesis Lab v2 Skins) come packaged in a box which is separate from the Head (except in the case of group gifts), so make sure that you have a Skin that you can apply to your head as it will not come with one. You will need to open the Skin package if it was separate and unpack it into your inventory to use it.
Remember that NAME = your chosen Skin name and SKINTONE is the colour you have chosen.
- Locate your Skin's Folder and ADD the HUD_Genesis_Lab_Skin_NAME_SKINTONE item.
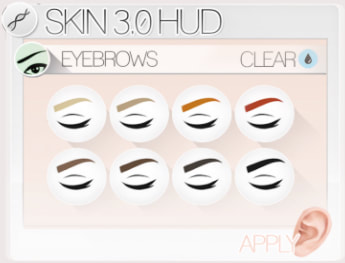
|
|
- If your Skin persists in staying grey or not coming in fully after a few moments, you can try clicking on the eyebrow button again. Sometimes Second Life has periods where an item on your avatar has seemingly gotten "caught" and prevents you from changing parts of your avatar. You can try removing other items to see if your skin appears and then add those items back after.
- If the Skin appears to not be applying at all, please try applying the Skin again from a different location, as your current one may have too much script-talking in the background for your head to "hear" the applier script talk to it.
Omega Head Setup
In order to use the Bento - Omega head with Omega Cosmetic Appliers, you will need to install the Omega scripts. Make sure you detach the regular Bento head before beginning this step.
First locate and ADD this item:
First locate and ADD this item:
- Genesis_Head_NAME_3.x Bento - Omega (Please Note: The female head will still need a Genesis Lab Skin applied to it, as Omega appliers are cosmetics only!)
To install the Omega scripts, you will need the Omega System Kit - Genesis item, available either from the Marketplace: https://marketplace.secondlife.com/stores/133475 or in-world: Omega Systems.
Once you have obtained and unpacked the Omega System Kit - Genesis package:
Now the female v3 Bento - Omega Head will accept Omega Cosmetic appliers and the male v3 Bento - Omega Head will accept Omega Skins and Cosmetic Appliers. Once you have installed the scripts in the Head, you will not need to do it every time you want to change appliers. You will only need to install the scripts if you get a new Omega Head.
Once you have obtained and unpacked the Omega System Kit - Genesis package:
- Locate and ADD the installer: Omega System Installer - Genesis
- Click on the installer whilst wearing the Bento - Omega version of your Head to install the scripts
- Detach the Omega System Installer - Genesis item
Now the female v3 Bento - Omega Head will accept Omega Cosmetic appliers and the male v3 Bento - Omega Head will accept Omega Skins and Cosmetic Appliers. Once you have installed the scripts in the Head, you will not need to do it every time you want to change appliers. You will only need to install the scripts if you get a new Omega Head.
Options & Cosmetics
The regular female v3 Bento Heads are capable of wearing any of the Eyeshadows, Eyeliners, Lipsticks, and Tattoos from both the v2 Cosmetic HUDs and the v3 Cosmetic HUDs. This includes items from Gacha machines, Group Gifts, and all third party Genesis Lab-specific appliers. In addition, the Settings Universal HUD which contains the options currently available for your head also contains several Cosmetic Appliers meant to work with your Head. The Male Settings Universal HUD will continue to work correctly with your male Bento - Omega head, but you will not be able to use the Genesis Lab v2 and v3 Cosmetic Appliers correctly.
Please Note: The v2 Eye Appliers and Eyelash Appliers will NOT work with the v3 Bento Head! The v2 and v3 Genesis Lab-specific Cosmetic Appliers, whether in the Settings Universal HUD, purchased separately, or from a third party will NOT apply correctly to the Bento - Omega Head as the texture mapping is not the same as the regular Bento Head.
Please Note: The v2 Eye Appliers and Eyelash Appliers will NOT work with the v3 Bento Head! The v2 and v3 Genesis Lab-specific Cosmetic Appliers, whether in the Settings Universal HUD, purchased separately, or from a third party will NOT apply correctly to the Bento - Omega Head as the texture mapping is not the same as the regular Bento Head.
Body Matching
There are Body Skins and Body Appliers for both the v2 and v3 types of Skins.
The v2 Body Appliers and Body Skins will only match the v2 Skins that apply to the Head, and they are free in the Genesis Lab Main Store.
The v3 Female Body Appliers and Body Skins will only match the v3 Skins that apply to the Head, and they are available on the Marketplace: https://marketplace.secondlife.com/stores/162916 and in the Genesis Lab Main Store. If you require the Omega Body Appliers, however, they are only available in the Main Store, currently.
For v3 Male Body Appliers, please go to Bold & Beauty's Main Store.
To use the Female Body Appliers after unpacking the bag, locate and ADD the item (where BODY is Maitreya, Belleza, Slink, Omega, or Vista Hands):
For the Female v3 Body Appliers, other than the Vista Hands, choose which cleavage option you wish to have and select the colour based upon the following numbers:
Please Note: These Body Appliers perfectly match with our same-version Skins. If you do not see the Skin and Body matching, make sure that you are using a v3 Skin for your head, that your body does not have a tint applied to it, and that you are not wearing a neck fix item, and then check your Graphics & Lighting (below).
The v2 Body Appliers and Body Skins will only match the v2 Skins that apply to the Head, and they are free in the Genesis Lab Main Store.
The v3 Female Body Appliers and Body Skins will only match the v3 Skins that apply to the Head, and they are available on the Marketplace: https://marketplace.secondlife.com/stores/162916 and in the Genesis Lab Main Store. If you require the Omega Body Appliers, however, they are only available in the Main Store, currently.
For v3 Male Body Appliers, please go to Bold & Beauty's Main Store.
To use the Female Body Appliers after unpacking the bag, locate and ADD the item (where BODY is Maitreya, Belleza, Slink, Omega, or Vista Hands):
- Genesis_BODY_Appliers_All_Tones_3.0
For the Female v3 Body Appliers, other than the Vista Hands, choose which cleavage option you wish to have and select the colour based upon the following numbers:
- Vanilla
- Milk
- Cream
- Cappuccino
- Tiramisu
- Latte
- Cocoa
- Toffee
- Brownie
- Chocolate
Please Note: These Body Appliers perfectly match with our same-version Skins. If you do not see the Skin and Body matching, make sure that you are using a v3 Skin for your head, that your body does not have a tint applied to it, and that you are not wearing a neck fix item, and then check your Graphics & Lighting (below).
Graphics & Lighting
If you do not have the appropriate Graphics Settings and/or you have a very harsh Windlight, you will not see a perfect match between the Head and Body. This is because the Head and Body have different kinds of reflections and harsh lighting or too restricted a level of graphics settings will cause all of the "seams" in the meshes to stick out and not blend together. Please make sure to remove all "face lights" as these are almost always far too harsh and will show all the reflection differences on your avatar mesh parts.
In the graphics settings under preferences (Avatar -> Preferences -> Graphics), make sure that you have Advanced Lighting Model turned on (it needs to have a tick in the checkbox). You may also need to turn off (no tick in the checkbox) the Local Lights if those are too strongly directed at your avatar.
For a Windlight, if you are using Firestorm, please try the Places Paris setting, which can be changed by going to World -> Environment Settings -> Environment Editor -> Fixed Sky, and choosing Places Paris from the dropdown box. If you do not see any seams or colour differences, then everything is working fine and you can choose a different windlight.
Help?
On this website are a plethora of resources to help you with your new Head. Please check the following pages to see if your question has been answered:
v3 Bento Head Guide
v3 Settings Universal HUD
v3 Male Settings Universal HUD
v3 Basic Animations HUD
v3 Bento Head FAQ
Reference Catalog
Dev Kit Manual
v3 Bento Head Guide
v3 Settings Universal HUD
v3 Male Settings Universal HUD
v3 Basic Animations HUD
v3 Bento Head FAQ
Reference Catalog
Dev Kit Manual
If something has happened along the way and it is not working for you, and you've checked all of the rest of the FAQ pages of this site, please send a *NOTECARD* to Scorpius (aiorii resident) in world. <3
